
How to build a DIY composting toilet in a campervan
By far and away, the question we get asked the most about our campervan is, “But where do you go to the loo?!” Up until recently, we didn’t have a toilet in our campervan. We are climbers used to spending time outside, and we didn’t feel the need for one. But once we decided to live in our van full-time, we realised that a van toilet might be a good idea.
What would happen if we were parked up in a city and couldn’t find a toilet? Or one of us suddenly got ill? So, we partnered up with Kildwick to build our very own DIY composting toilet! Read on for exactly how we did it…

How does a composting toilet work?
Before we explain how we built our DIY composting toilet, it’s useful to understand how a composting toilet works. The basic premise of a composting toilet is that urine is stored in a small tank at the front, and solid waste is collected in a second tank at the back. Composting toilets minimise smells in two ways:
- Using a urine diverter
- Using bulking material
Urine diverters
A composting toilet relies on something called a ‘urine diverter’. When you sit down to go to toilet, this ‘diverts’ urine to the front, and allows solids go straight down into a container at the back. When solids and liquids mix together, this creates a not so pleasant ‘toilet’ smell. By separating the two, the solids are kept dry and smells are reduced.
The urine diverter is divided into two sections – a front ‘basin’ shaped section which funnels urine forwards. This is separated by a ridge from the back half of the urine diverter which has a large hole for solids. It’s important that you sit down when you use a composting toilet, whether you’re male or female, as the diverter only works this way!


Bulking material
Bulking material is used in the solids tank of a composting toilet and helps to reduce smells by drying out the solids. Bulking material for a composting toilet can take a number of forms, but the most common are:
- Sawdust / wood shavings
- Coconut coir
- Miscanthus (elephant grass)
Peat moss has typically been a popular bulking material for composting toilets in the past, however it is incredibly bad for the environment. Peat moss is harvested from peat bogs, but these are extremely valuable in removing carbon dioxide from the atmosphere (acting as a ‘carbon sink’).
Therefore, you should use a more sustainable bulking material such as coconut coir or miscanthus. Coconut coir is a byproduct of the coconut industry, and miscanthus has a sustainable production, making them preferred products. Coconut coir can typically be bought from garden centres, and sawdust can be picked up from pet stores.
As well as stopping your loo from smelling, bulking material also adds carbon to aid with the composting of your solids. It also serves as a ‘visual cover’ – i.e. it stops you staring at your poop when you’ve been to the toilet!
What components do you need for your van toilet?
Before you start building your DIY composting toilet, you will need to make sure you have all of the right components. We mostly used components from Kildwick for our van toilet, along with a few bits and bobs such as connectors and jubilee clips from eBay. We also used a small 4 litre water tank from Tanks Direct for our urine tank, as the Kildwick urine tank didn’t quite fit in our space.
You can find all of the links to bits we used below (these are affiliate links that will earn us a small commission, at no extra cost to you).
- Urine diverter
- Bucket/container for ‘solids’
- Tank/container for ‘liquids’
- Urine siphon (bottle trap)
- Tank connect with 1/2″ BSP female thread
- 1/2″ male BSP thread to 19mm barb
- 1-2m 19mm internal diameter hose
- 22x30mm jubilee clip
- Compostable waste bags
- Sawdust, miscanthus or similar
How to build a DIY composting toilet
Building a toilet container
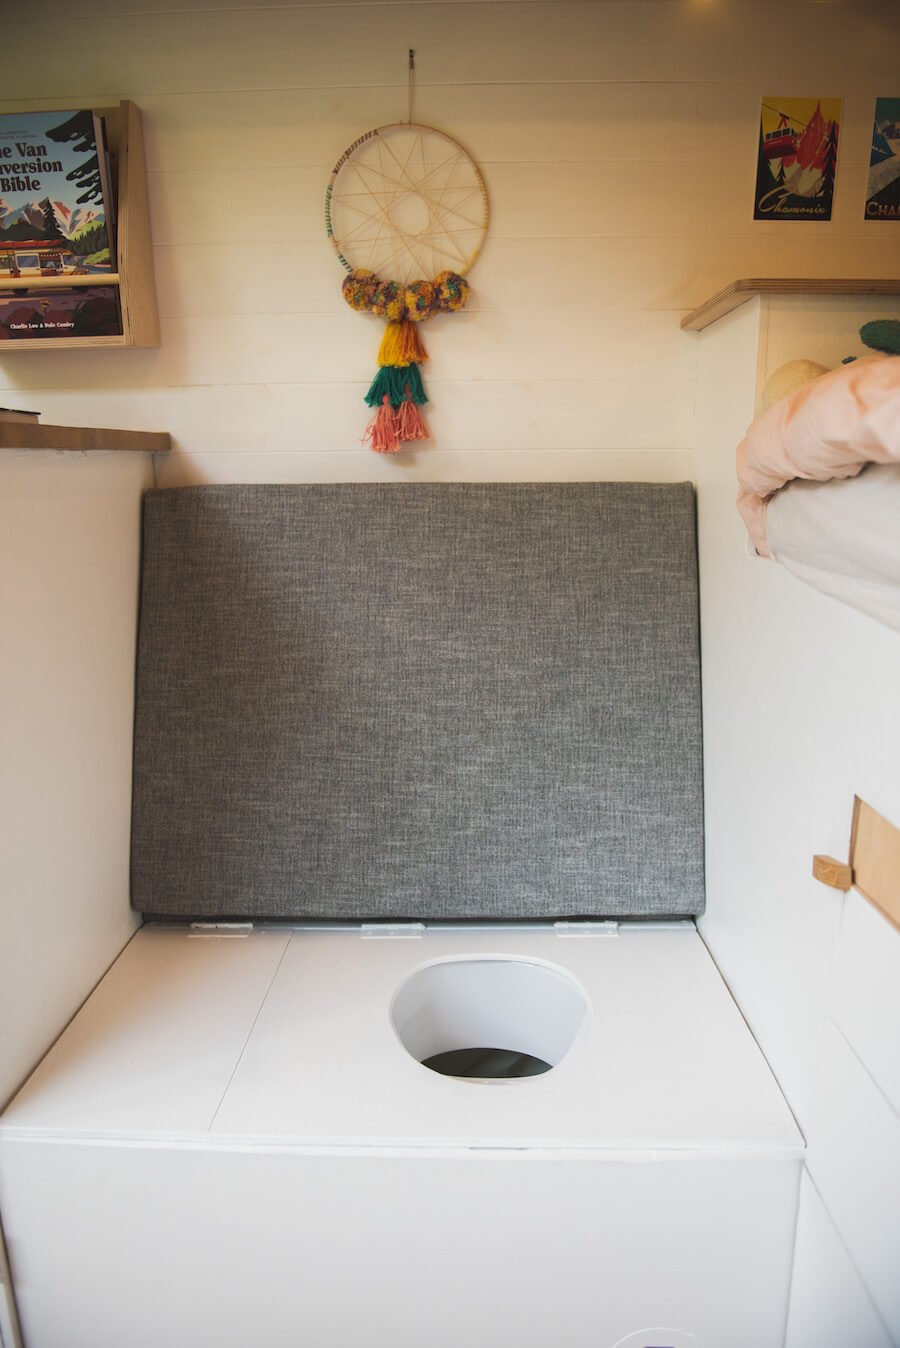
First, you will need to build a container for your van toilet. We used the space below one of our benches, but if you don’t have an in-situ space, you can build a simple box to store it in. Alternatively, Kildwick sell a DIY composting toilet set that includes everything you need to build a box to store your toilet too!
Preparing the urine tank
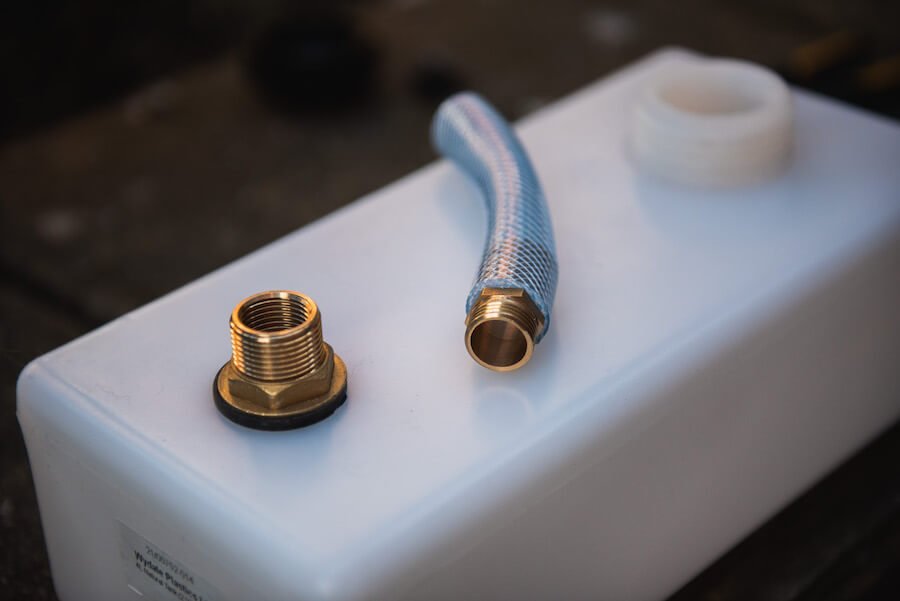
We bought a 4 litre tank from Tanks Direct as this fit perfectly inside our bench seating. Alternatively, Kildwick have a 5L urine tank and a 9.5L urine tank. To ensure that when you’re driving around you don’t have any unfortunate leaks (!), it’s a very good idea to connect the pipe from the urine diverter to the tank via a hose and a tank connector. If you put the hose straight into the opening of the tank, when you’re driving around the urine can slosh around and spill out the opening! To avoid this, we drilled a hole in our tank and connected a tank connector and a barbed connector.
First, measure your tank connector. Ours required us to drill a 25mm hole in the tank. You should ideally do this using a hole saw, but we didn’t have one of the right size, so we used a stepped drill bit. Next, connect the tank connector to the tank. If you have a tank with a small opening like us, this can be a little fiddly! We used a nut on the end of a piece of string to thread the tank connector through the hole and screw it up tightly. Take a look at our Instagram story highlight for how to approach this!


Next, connect the barbed connector to the tank connector. We applied some PTFE tape to the connection to ensure it wouldn’t leak. We also used a jubilee clip on this connection as this is the ‘downstream’ connection that’s more likely to leak.
We left the connection between the pipe and the siphon on the urine diverter without a jubliee clip, as this will make it easier to remove when we’re emptying the tank.


Preparing the solids tank
This is a relatively quick job. If you have a large toilet enclosure, all you will need to do at this point is line your waste container with a compostable waste bag, and fill the bottom 2-5cm of it with your bulking material.
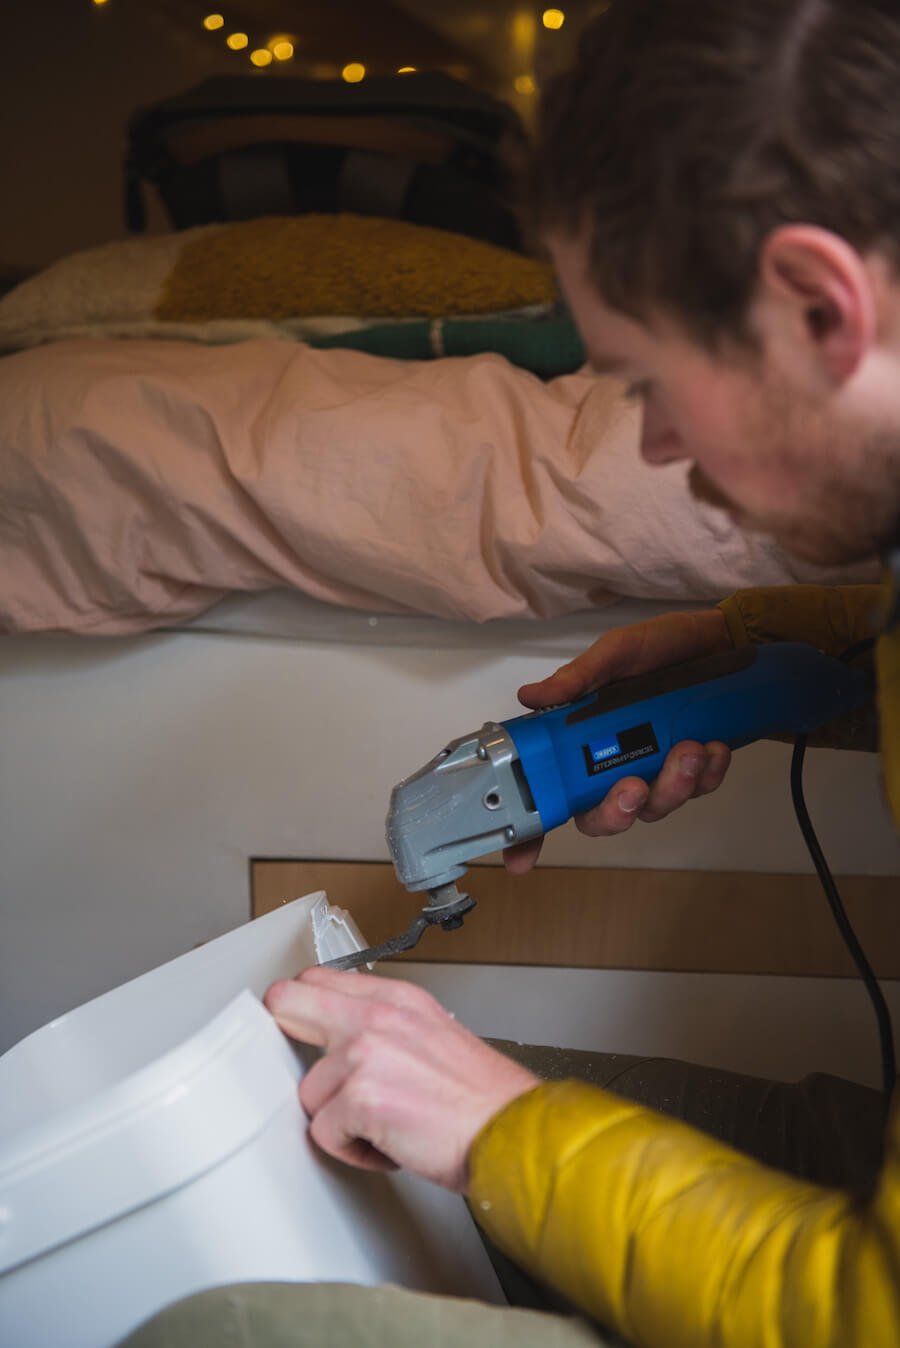
If you have a smaller toilet enclosure like us, you may need to modify your waste container slightly. To ensure the lid of our bench would still close with our urine diverter overlapping the container, we needed to trim a small section of the lip off. We did this quickly using a multi tool.
Connecting the urine diverter
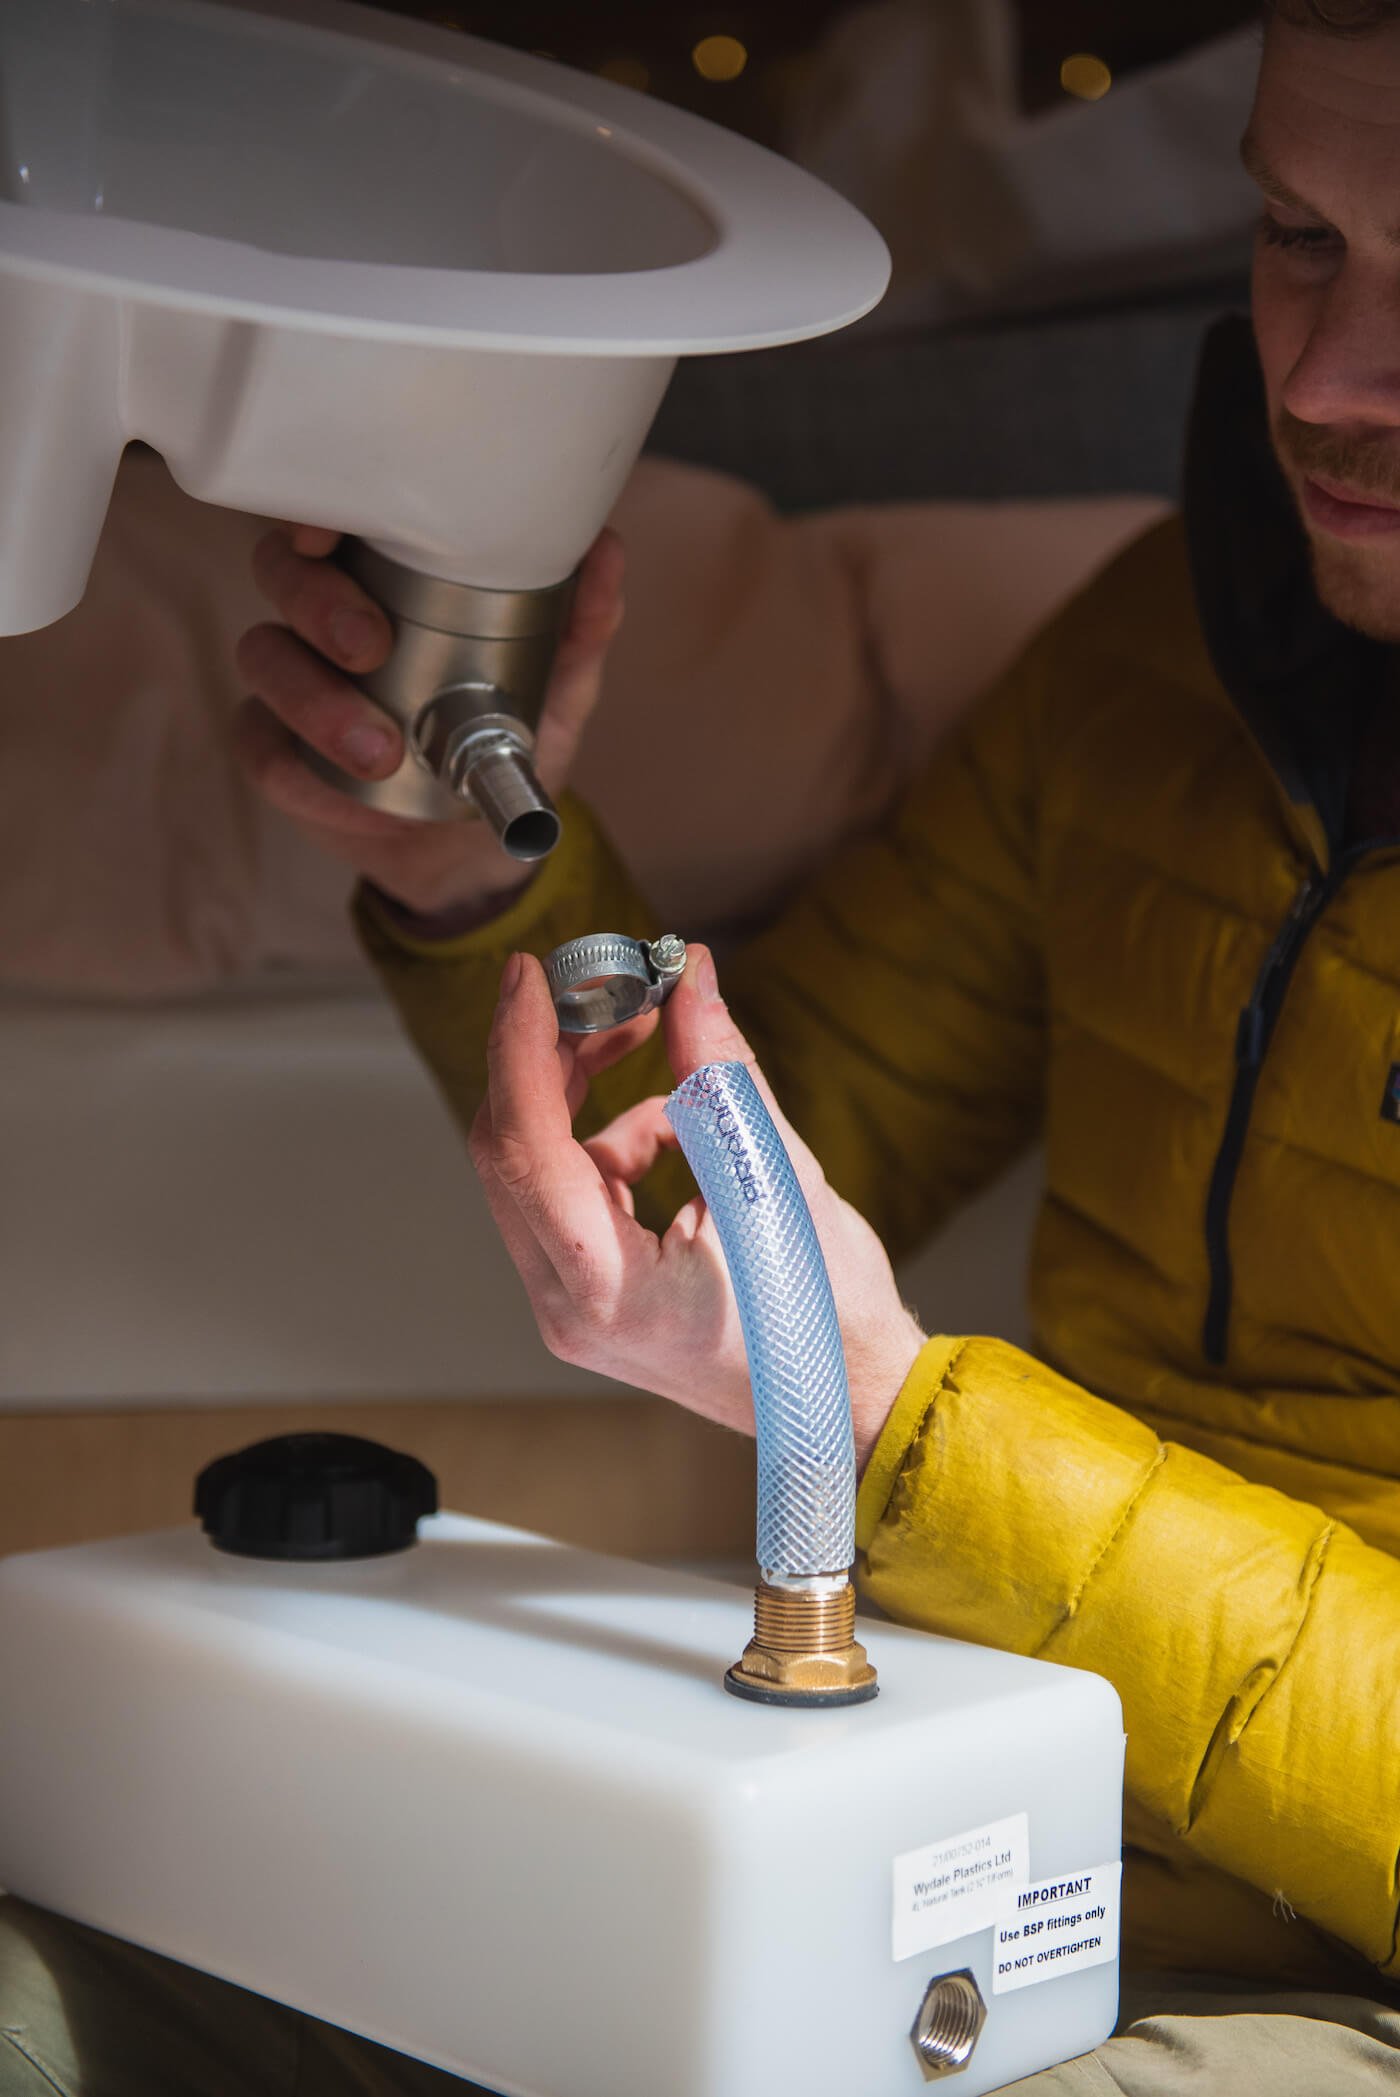
We used a stainless steel siphon from Kildwick with our urine diverter. This acts like a bottle trap found below a sink, creating an ‘odour trap’ and minimising smells from the urine container. This can be connected in to the urine diverter in a couple of ways. You can mount the siphon to the wall of your container with the bracket provided as illustrated on their website. Alternatively, we found a slightly longer M5 bolt so we could put the drain disk on the inside of the diverter. This means that when the urine diverter is removed, the siphon stays connected to it.
We did this because our bench is quite a small area for our DIY composting toilet, and this made it possible to still remove the urine bottle from the space. If you have a larger container, it might be easier to mount it to the wall of the container as suggested by Kildwick.
Once the siphon is connected, the hose that you’ve already connected to your liquids tank can simply be pushed onto the barbed connector on the siphon.
Letting the tank breathe
It might seem counterintuitive to create an open hole in your tank, but without it the urine won’t be able to enter the tank. Because the siphon from Kildwick acts like a bottle trap and holds a small amount of urine at all times to prevent smells from escaping, this means the air in the tank is trapped. If an air path is not created, urine will simply overflow from the siphon! The tricky bit is letting the tank breate in a way that A) won’t leak, and B) won’t let the smell out.
To achieve this, we drilled another hole in the top of the tank. We added a tank connector to this and then a long piece of hose. The hose allows the tank to breathe and is long enough to pass through one of our drop out vents, so any smells will exit the vehicle (along with any pee if the road ever gets really rough!).


Mounting the urine diverter
You can mount the urine diverter in a couple of ways. If you have mounted your siphon to the wall of your DIY composting toilet, you could screw the urine diverter directly into your ‘toilet seat’, or the lid of your van toilet. Alternatively, you can cut a recess for the urine diverter to sit in, as we did. You can either do this with a router or a multi tool. We used a multi tool as we were mounting it into a bench seat that already existed in the van and it was easier to get into the space, but if we were doing it from scratch we would have probably used a router.
First, place the urine diverter where it will sit. Next, draw around the diverter to mark out where you will need to cut the recess. We used a multi tool to remove the depth of the urine diverter so that it would sit flush with the ply, and we would still be able to close the lid of the bench above it.

Creating the toilet seat
If you have enough space, you can use a standard toilet seat. But as we were fitting ours into our bench seating, we turned the lid of the bench into our toilet seat! First, we marked out the area we needed to cut using a stencil supplied by Kildwick. We made it a little smaller so the opening wouldn’t be too big.
Next, we used a jigsaw to cut the circle out from the middle of the bench seating. Once it was out, we used a router to round the edge. Finally, we sanded the edge (so we wouldn’t get any splinters in our bum!). Once the shape was cut out, we reattached the lid of the bench. The foam of our bench seat is mounted to a piece of ply, so this fits neatly over the top of the bench lid with the hole in to hide the toilet away!


Once we had reattached the seat, we secured the solids container and liquids tank in place with some wooden battens and ply, so they wouldn’t be able to move around when we were driving! We placed them into the bench, put the urine diverter into place, and then all that was left was to test it out!
Thanks to Kildwick for sending us some of the components to create our van toilet! If you’re planning on building a DIY composting toilet, head over to their website and check out their products!

How to convert a campervan
Want to know exactly how to convert a campervan? Our 331 page bestselling book, The Van Conversion Bible, covers all aspect of a van conversion, from planning your layout to a step-by-step build guide.

Hey, Love your book its so helpful! How often do you change the loo and how?
Hi Sofia, glad you’re finding the book useful! We empty our toilet about once a week. The urine pot can be emptied down a drain, or it can also be emptied outside if you are considerate about where you empty it – i.e. away from public places or water sources etc. The solids unfortunately usually has to be disposed of in the general waste, unless you’re able to find a compost heap that you can use!
This is great, I’m going to do the same. Much simpler than trying to plumb in a toilet also. Is there anything you’d add? I notice you haven’t used a fan – would you suggest one? Not sure where to “exit” a fan though.
Hi Brian, if we did it again I think we’d mount the pee tank below the van. This ensures you can fit something a bit bigger in, and allows you to fit an overflow which avoids any leaks! I don’t think a fan is needed – for us, as soon as we close the lid on the bench that it’s mounted in, you can’t smell the toilet, you only smell it when you open the lid to use the toilet. So you just need to ensure it’s in an enclosed space. Good luck with it!
I have the same toilet and opted for the siphon as well. Since the siphon requires a small amount of pee held, does it smell? Do you have to dump a small amount of water after peeing so that it doesn’t smell?
I’m considering just not using the siphon and using a hepvo valve instead.
Hi Sam, it doesn’t smell as long as you use it regularly! Pee tends to smell the longer it’s exposed to air, so as long as you’re using the toilet regularly and essentially replacing the liquid held in the siphon then it doesn’t smell 🙂 hope that helps!
Do you use a vinegar spray to clean it? And what do you do to cover n2? Do you have a pack of sawdust on the side that you use to cover it?
Thank youuuu
Hi Alice, you could use any sort of cleaning spray to clean the toilet. We have a mixture of hay and coconut coir, but you could also use sawdust or something similar. Hope that helps!