
Insulating a van – we explain the best way to insulate your camper
Insulation is one of the most important steps of a van conversion. Without insulation, you will get very cold in the winter and very hot in the summer!
There is a sea of conflicting information about campervan insulation online. When we converted our own van, we spent a lot of time reading up to decide the best campervan insulation scheme. Read on for a step-by-step guide on how to insulate a van.
Want to delve deeper into the world of campervan insulation? Read our article about which campervan insulation you should pick for your van conversion.
Main components needed
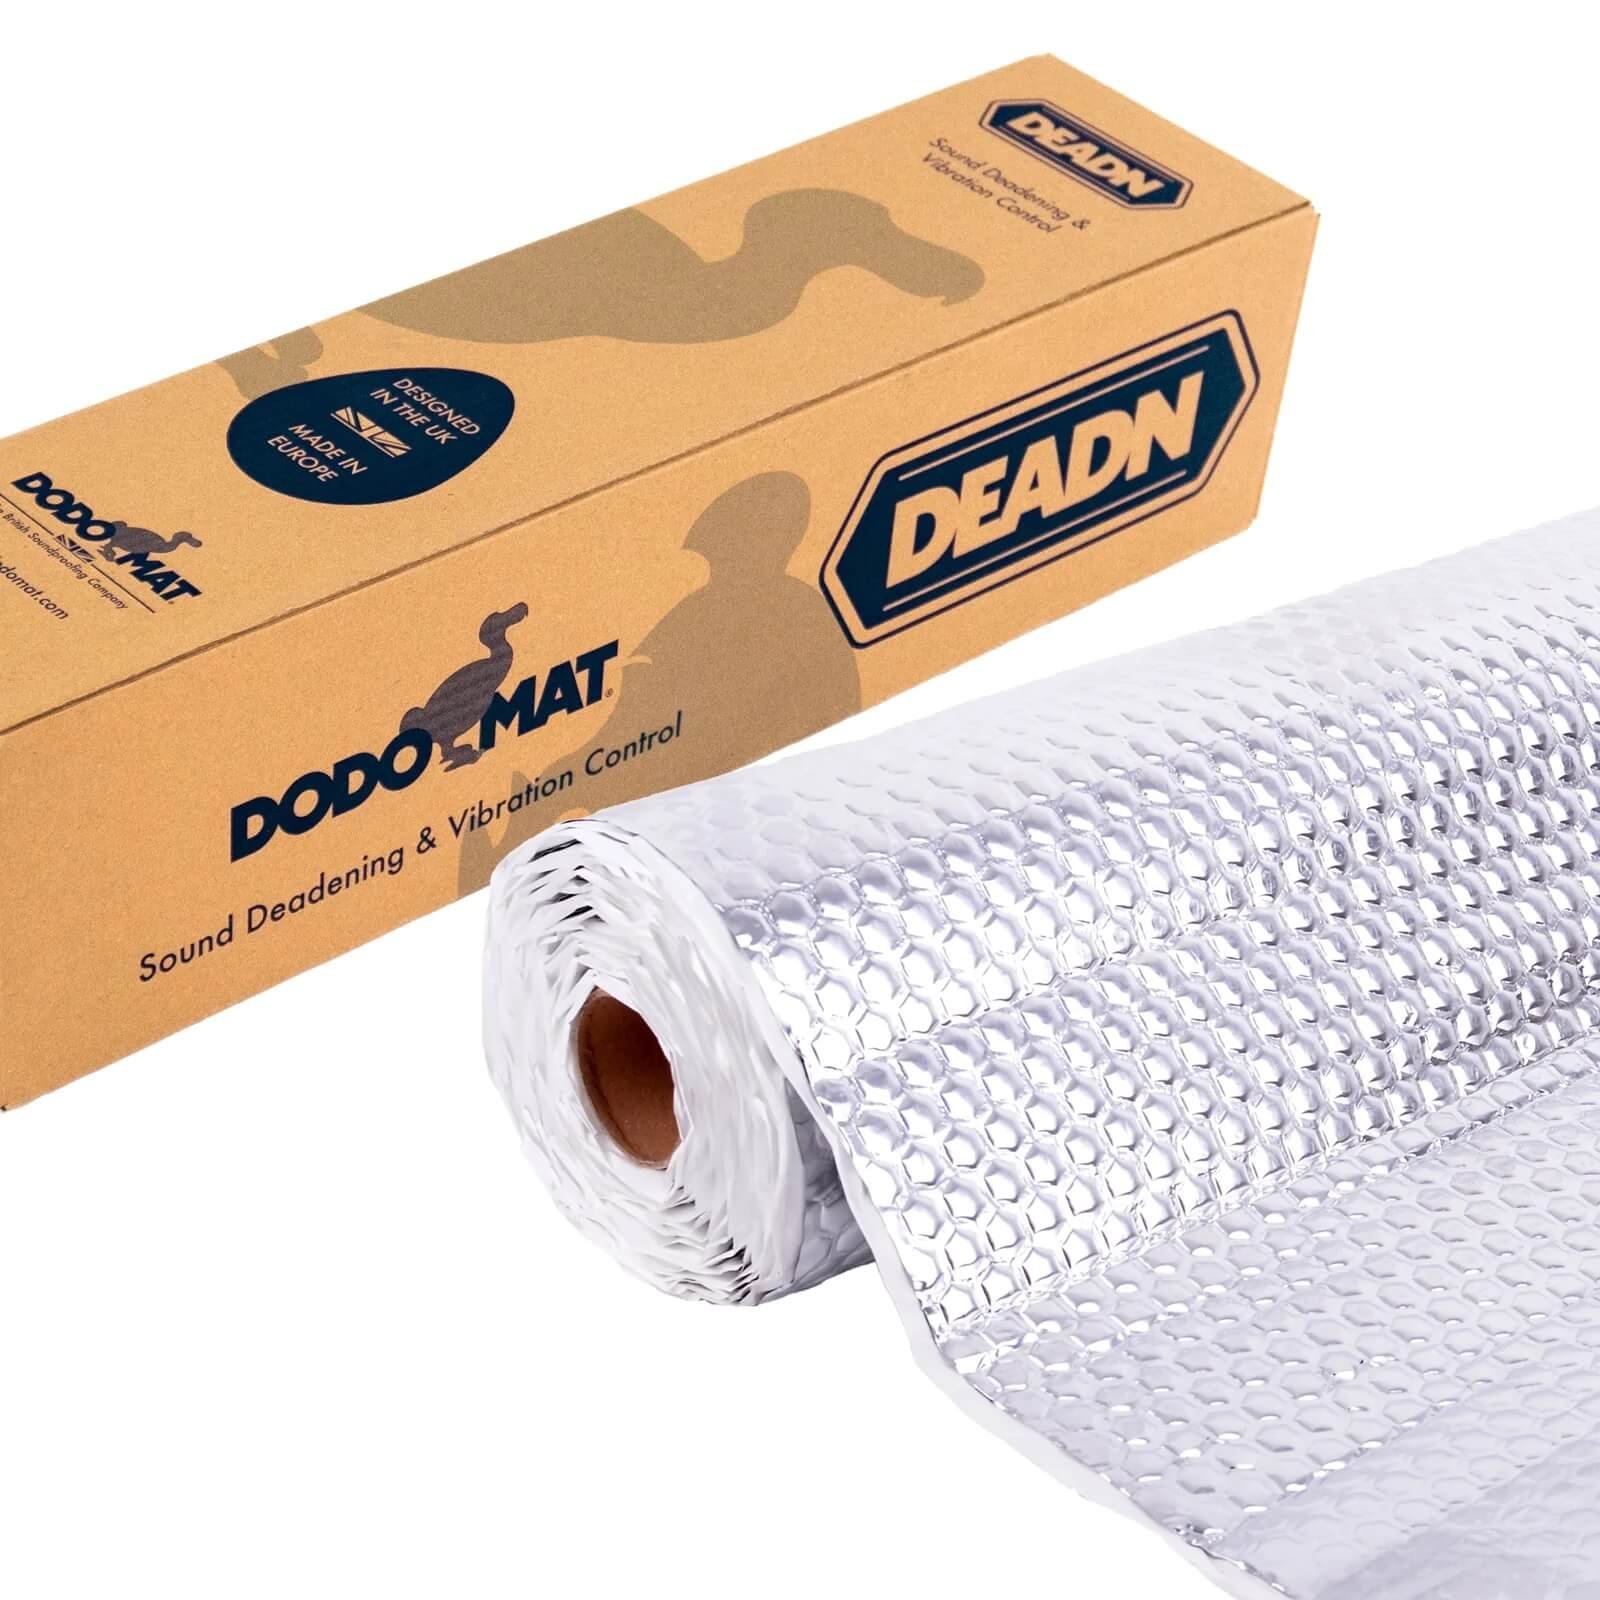
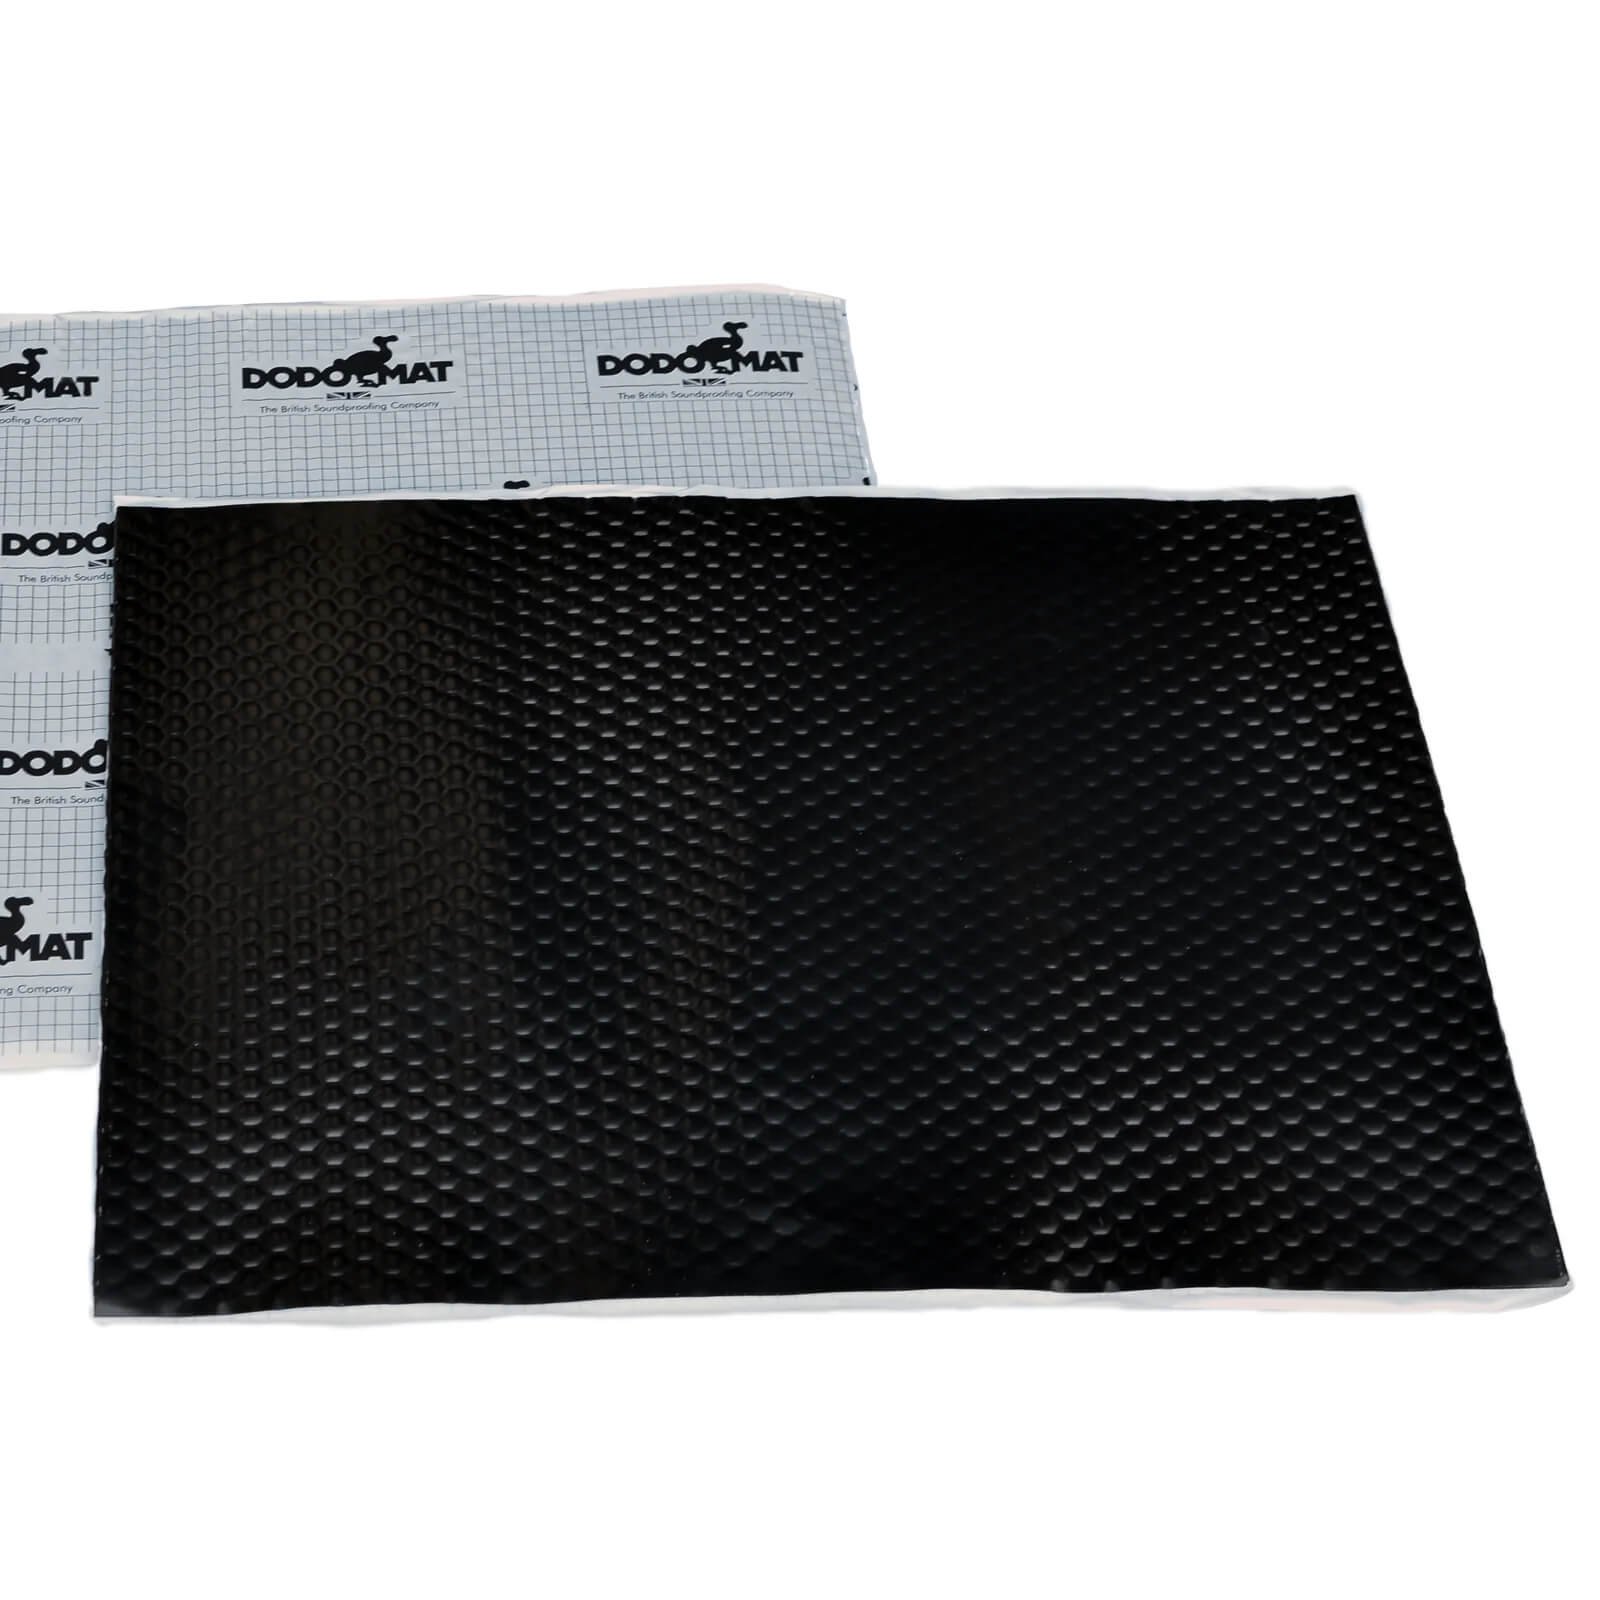
- Sound deadening (to dampen noise such as rain)
- Thermal insulation board (to fill the large cavities in the van walls)
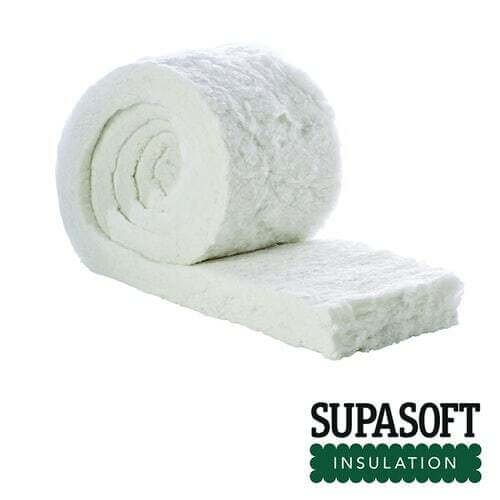
- Rolls of wool insulation (to stuff into harder to access nooks and crannies)
- Vapour barrier (to prevent condensation reaching the insulation)
We sell insulation and sound deadening in our webshop! Have a browse of what’s available:
Prepping your van
Before you start insulating, you’ll need to completely gut your van. This involves taking up any existing floor, removing any lining and patching up any rust. This is always a very nerve wrecking part of the build, as it’s everyone’s worst nightmare to lift up their floor and find it covered in rust! Older Mercedes Sprinter vans can have awful problems with rust, but luckily ours is a 2013 reg and had only tiny spots of rust after cleaning away the dirt. We used some Hammerite ‘direct to rust’ paint to cover these areas before insulating, to ensure the rust wouldn’t spread.

Sound proofing your campervan
Before you start insulating a van, you’ll need to completely gut it. This involves taking up any existing floor, removing any lining and patching up any rust. This is always a very nerve wrecking part of the build, as it’s everyone’s worst nightmare to lift up their floor and find it covered in rust! Older Mercedes Sprinter vans can have awful problems with rust, but luckily ours is a 2013 reg and had only tiny spots of rust after cleaning away the dirt. We used some Hammerite ‘direct to rust’ paint to cover these areas before insulating, to ensure the rust wouldn’t spread.
Before installing any of the insulation, we stuck sound deadening strips to the roof and walls of the van. These are really important to provide sound proofing to your campervan if you don’t want it to sound like a tin can when it’s raining! They take the resonance out of the panels and deaden the sound. We used Silent Coat sound deadening strips which are super easy to apply, and easy to cut to size if you need to use them on smaller panels.
Insulating a van – floors & walls
We used a mixture of 40mm thermal insulation boards and recycled bottle wool, as there are large spaces that you can fill with the boards, but there are also lots of little hard to reach places that you can fill with the wool.
We chose 40mm Recticel thermal insulation boards as these were thick enough to fill the cavities in the roof and walls between the beams. As we would be battening over the beams anyway, it made sense to us to fill as much of this space as possible. There are a few different brands of thermal insulation board you can buy (Celotex, Kingspan, Recticel) but they all have very similar R values. We went for these over expanded polystyrene board because although it’s more expensive, it has much better thermal properties (a thermal insulation board of 40mm has an R value of 1.8 vs. 1.05 for a polystyrene board).
Cutting these to size is super easy – you can score them to mark out sizes, and then chop them with a saw or bread knife. It’s worth noting that this makes an awful screeching noise!
We chose to use recycled bottle wool instead of fibreglass or rock wool as it’s much nicer to work with (it’s not itchy and you don’t need to wear a mask), and it also has the benefit of being much more eco-friendly as it’s made completely from recycled bottles. We used ThermaFleece SupaSoft polyester wool.
We spent quite a long time stuffing the bottle wool into all of the nooks and crannies in the van. If you don’t do this, it means there are huge areas of empty space in your van that aren’t insulated, so it’s worth spending the time trying to fit as much insulation in as possible, even if this means the slightly tedious task of posting fluff into small gaps with a screwdriver!
Insulating a van – the bulkhead
We built a bulkhead divider between our cab and the back of our van, mainly because of security, and also so that the back of our van would be better insulated. We decided to use 25mm insulation board for the bulkhead so that it wouldn’t eat into the kitchen space too much. As we had built a wooden framework for the bulkhead, it was really easy to slot pieces of insulation into the spaces between the batons.


Insulating a van – the floor
We were super surprised to read that a lot of people put barely any insulation on their floor. As the floor is the place you will lose a lot of your heat from, we went for 40mm thermal insulation boards on the floor. We built a stud work frame with 40mm wide batons which left room to slot the boards into. We worked out that by adding 40mm to the floor we would still have 180cm of height inside our van. As I am a tiny 5″3 and Dale is 5″11, this would mean we would maximise insulation on the floor whilst still both being able to stand up in the van.
Installing a vapour barrier
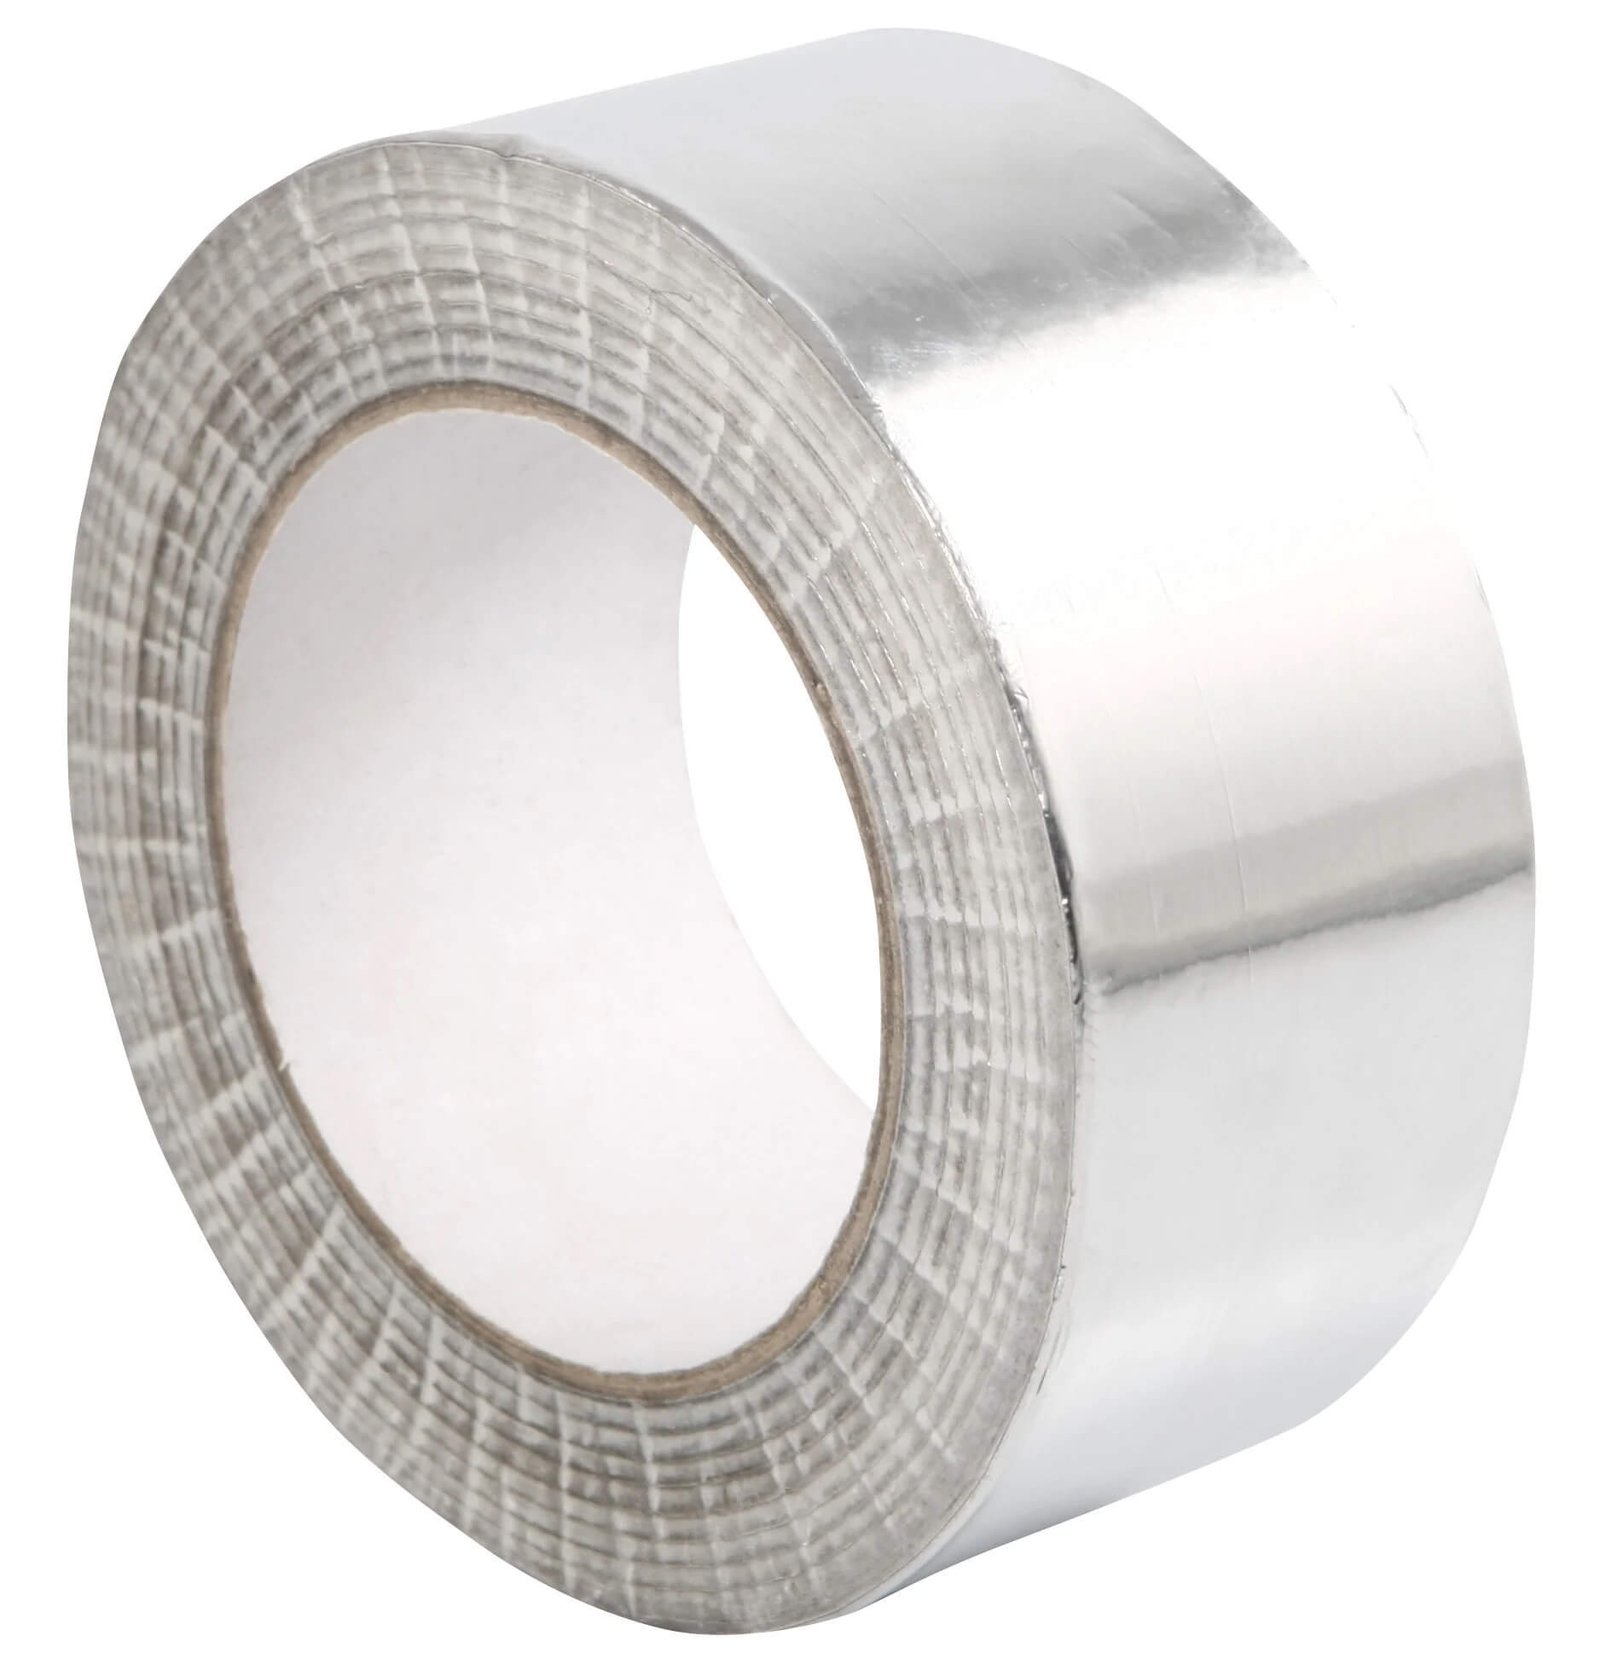
Once all of the insulation was in place, we then covered the whole van with a huge roll of silver bubble foil insulation. This is basically like bubble wrap made from silver foil. This provides a vapour barrier between the inside of your van where you are breathing, cooking and creating condensation, and all of your lovely insulation. We used several cans of spray adhesive to hold the foil insulation in place, and then taped the seams using aluminium foil tape.


Now that we’re fully insulated the fun really starts! Next on our list is electrics and building the stud work for the bed and other wooden structures.
Here’s a photo of Ringo completely ‘naked’, and one from after all of the bulkhead and floor insulation was finished.


How to convert a campervan
Want to know exactly how to convert a campervan? Our 331 page bestselling book, The Van Conversion Bible, covers all aspect of a van conversion, from planning your layout to a step-by-step build guide.

Thank you for the post, it’s super useful. I’ve recently bought a VW T4 with a fiver glass pop up added. The previous owners have stuck the foil bubble wrap to the van and then put up plywood. I’ve taken the plywood off and plan to leave the foil, then a layer of wool/ recycled bottles and then wood panelling. Do you think I should put a second layer of the foil bubble wrap over the wool to prevent condensation? Do you think it’s ok to have a layer of foil directly on the van and then insulation over or will this cause condensation? Thanks for any advice.
Hey, glad you have found the post useful. So we would suggest removing the foil bubble wrap that is stuck to the walls of the van, its insulative properties will be pretty poor when stuck directly to the metalwork. The rest of your insulation strategy sounds sensible though: Use a Polyurathane insulation board to fill the large cavities then cram as much recycled bottle wool into all of the gaps. You can then reuse the aluminium foil and stick it over the insulation covering all surfaces if possible. We would also recommend taping the vapour barrier gaps to create a fairly well-sealed insulation cavity. The vapour barrier is one of the most heavily contested areas, usually with people saying “its impossible to fully seal it so what is the point” but from all of the research and calculations we have undertaken in the past few months we are completely convinced of its benefits. Anecdotally, all of the vans we have stayed in that don’t have them get very damp overnight and long term have mould issues etc. In our van, we can do pretty much anything and never see any condensation build-up. Sorry went a bit war and peace on that! Hopefully the advice was useful, good luck with your build!
Hi, I have a factory fit metal bulkhead with a ‘window’ (no glass yet) between the cab and interior. What do you think are the pros and cons of keeping it? I like the security aspect and it would save me building a wooden frame!
Hey Karen, we’d recommend removing the metal bulkhead as these are typically incredibly heavy! We had a metal bulkhead with a sliding door when we bought our van and we removed it for exactly this reason. It’s a better idea to remove it and build a wooden frame to insulate. There is also a second hand market for the metal bulkheads so if you do remove it, you can probably sell it on Gumtree or similar. You could use the metal bulkhead as a template to draw around to onto a sheet of ply to save yourself some time when building the new one. Hope that helps!
Thanks so much! Am loving reading your pages and feel much more confident about the conversion. Have pre-ordered your book too. Will definitely take your advice.
Thanks, that means a lot – glad our posts have been able to give you some more confidence, hopefully the book will help more with that! 🙂
Hi! We have a yellow sprinter too! Ex DHL?
Just wondering have you done stud work drilled through the vapour barrier after?
Yep, ours is ex-DHL too! Yes, we attached the vapour barrier on top of the insulation, and then screwed battens in on top of this to attach our cladding to. Don’t worry about tiny holes in the vapour barrier from the screws, it will only be subtly affected by these and is hard to avoid!
Hi, I’ve just ordered your book due to this post, very impressed with the step by step way you describe things.
I’ve just got a Vauxhall Vivaro 2010 and it doesn’t have a bulkhead, my plan is to install 2 captains seats in place of the originals at the front. I wanted to ask you opinion on whether it’s worth insulating the back without a bulkhead? Will it make much of a difference in the long run?
Hi Jim, you should definitely still insulate the rest of the van even if you’re not including a bulkhead. You will lose the most heat to the cab without a bulkhead, but it will slow down loss of heat considerably by insulating the rest of the van. It’s also possible to install a thick thermal curtain between the cab and the back of the van to prevent further heat loss out of the front whilst sleeping. Hope that helps!
Thanks for your reply, I will go ahead and do that then. I wasn’t sure it was worth it but I’ll look around for a thermal blanket as well.
Cheers
Hi, I just removed the bulkhead and plan on building my own wooden frame with a slide-down window. I was wondering how wide the slats are you used? 40mm by ?? I also wonder where U attached the framing to the van? I can attach the upper slat to the metal where the bulkhead was fixed and use the floor to attach the bottom slat but where did you attach the vertical slats? is it strong enough to just attach those to the bottom and upper slat?
Hey Thomas, we used 40x40mm battens to build the studwork for our bulkhead so we could put 40mm insulation in the gaps. We attached battens across the top and the bottom, with 4 or 5 vertical battens and a couple of intersecting rows. By the time you’ve ply lined or clad it, that will give it more than enough strength!
Where did you manage to source these sizings from in England for the timber frames please? I’ve tried all of the big timber merchants locally and they only stock softwoods like redwood in fairly random sizes. Were they custom cut? The C16 carcassing wood is usually much bigger at 50mm x 100mm and up. Travis Perkins seem to have the biggest range so far. Thanks!
Hi thanks for this, really helpful! How much insulation board did you end up using?
Hey – really sorry, we can’t remember exactly how much we used. We just worked out the square meterage of our van interior minus the windows and bought that amount, and it was pretty close to perfect for the amount that we needed! You should be able to do the same to get a decent idea of how much you’ll need.
Heyo!
Love the site and super helpful posts 🙂
I was just wondering what you did about flooring after you’d applied the vapour barrier?
Did you apply some form of flooring straight on top or did you add another layer for a bit of sturdiness, like ply or something?
Hey Ian, glad you’re finding the site useful! It depends what flooring you’re using – we used a 12mm hardwood floor in the van, so didn’t put anything below this as it was already quite sturdy. But if you’re installing a vinyl or laminate it’s probably best to use 12mm ply beneath this, otherwise it will be easy to end up ripping it. You can use a spray adhesive to attach vinyl, but if you’re using a hardwood you can just let it ‘float’ and leave a very small gap at the edges because it can expand. Hope that helps!
That makes sense – thanks guys!
Just to follow up on this – we’d like to install hardwood flooring too – have you found there is any sagging between the battens? We’re trying to avoid using a ply layer over the vapour barrier for weight and headroom reasons. Thanks!
PS just ordered phase 1 from Nomadic Energy – what a fantastic idea and great service so far from Dan and Molly – thank you!
Hi Max,
We personally haven’t noticed any sagging in the flooring, however our floor is pretty thick. Insulation board is surprisingly strong if a load is well dispersed across it, so if you match the batten height to the insulation thickness this will help. You can also be tactical in where you place the battens beneath the floor, if you have a “corridor” or high-traffic area you could add more battens or place the battens in the middle of the walkway to limit any movement.
Hope this helps and thank you so much for your order!
This all looks very interesting, and I am going to further explore your site, and add your book to my letter to Father Christmas.
One question though: I understood that to convert a van in to a camping bus (in my case, an LDV 400), I needed to provide access from the front of the van in to the back. You seem to have completely blocked off access.
Have I got this wrong, or has the law changed?
Hi Peter, glad you’re finding our website useful! In the UK there are no requirements about having access to the back from the front of the vehicle, and it’s also very hard to get your van officially reregistered as a campervan. This means that most people in the UK can pretty much do whatever they want, as the classification of the vehicle is more about how it looks on the outside, so for example, ours is a ‘van with windows’. However, I’m not sure what the rules are in other countries. Hope that helps!
Hey!
We have just uncovered nightmare insulation from taking down the roof following a long term leak. I am following your guide (and will be following your book when it finally arrives following Royal Mail misplacing it). I’m hoping to stuff the wee gaps with therma fleece like you guys did but wondering how much you ordered as a rough guide? Many thanks! Sophie
Hi Sophie, oh no what a nightmare! If you don’t receive the book soon please drop us an email at [email protected] and we will get another one sent out for you 🙂 We ordered roughly 1/3 of the total surface area of our walls and ceiling of recycled bottle wool which seemed about right from memory. This is of course assuming that you have a foam insulation board that covers the larger expanses. Hope that helps, good luck!
Hey, Can you remember how many sheets of the board insultation you used?
Thanks
Hari
Hi Hari, unfortunately I don’t remember. You’re best to calculate the surface area of the inside of your van and base it on this – this is what we did. Hope that helps! 🙂
Hi guys,
Did you leave doors uninsulated ? Have seen something about water needing to flow through doors as factory made, but can’t find details. Many thanks!
Hi Anna, we insulated the doors the same way as the rest of the vehicle – using celotex and recycled bottle wool, and then applied a vapour barrier. You should remove all of the black plastic trim from around your vehicle and seal it with silicone to stop water entering the van, as long as you do this there shouldnt’ be any water flowing through the inside of the door! Hope that helps 🙂
Hi guys
I got your book for Christmas and love it!! I am still reading and “thinking” and hopefully not jumping into anything too soon. What do you mean by removing all the black trim? On the outside or internally?
Hi Magz, there’s a photo on our Instagram, you can pop them off from the outside and then silicone them: https://www.instagram.com/p/BuwsB9Nne9u/
Hiya,
Really value all the info you guys are putting out there!
(Also currently waiting to work out exactly what I need and order my electric system with you 🙃!).
Quick question – I see various different methods of electrics vs insulation. It looks like you did all your insulation first before then installing electrics? I just wondered pros and cons to this, how you managed to keep all the wiring safe without getting compressed by cladding over your vapour barrier?
Many thanks 🙂
Ally
Hi Ally, we always recommend insulating first and then running cables, as this allows you to reach them more easily in case of any issues. We used a few thin vertical battens which we then attached cladding to, so the cables all sit in the gap created by the thin battens. There’s a bit more info in our cladding blog post. Hope that helps!
Hi to you both,
love the amount of detail you have provided here and in the book, my only question is, what depth celotex have you used ? and have you stuck this to the sides of the van or left a gap? My son has the book but Iam doing most of the work as he works shifts, is it possible for me to get Ebook access or do we have to pay again? Many thanks Trev.
Hi Trev, we used 50mm celotex as this fits in the recesses of the van walls really well. You can fit it into the recesses and it shouldn’t need any spray glue etc as it jams into the space really well! We then used a little bit of tape if required for any large pieces. Hope that helps!
Thanks to both of you for your help, have a very Merry Christmas and Fantastic New Year, from our family to yours. Trev, Deb and Jeff.
Hello!
We got your book for Christmas and love it.
I’m a total rookie and still struggling for the order in which we do the insulating.
My questions are, what do we do with the corragated effect on the floor as surely this makes laying stuff difficult?
Next I noticed you have wooden battens, how did you fix those?
Thanks in advance!
Hannah & Dave
Hi Hannah & Dave, on page 215 in the Build section of the book we explain about creating a bit of a batten structure on the floor, how to attach it and insulating within this, hope that helps!
Hey! Got your book for Christmas and its been so helpful! At the beginning of my van conversion and wanted to ask whether you use adhesive on the vapour barrier as it should be actually touching/glued on to the insulation boards and metal of the van behind it?
Should I also use it on the floor, under the ply?
Do I really need a Maxxair roof vent if I have a large opening skylight at the back of the van and a sliding window in the van behind drivers seat and then of course all of the doors? They are expensive and take up space on the roof that I wanted to use for decking, skylight and solar panels.
Would love your advice! Thank you, Giorgetta
Hi Giorgetta, glad to have that you are finding our book useful! We used spray adhesive to attach the vapour barrier. You don’t need to use much, because as soon as you attach any battens, this will help to hold the vapour barrier in place. You might find that a little on the floor is useful, but again, you shouldn’t need much!
If you have a skylight and a sliding window, you should be fine without a fan as this will encourage enough airflow to prevent condensation, and the skylight can be opened when cooking etc. Hope that helps 🙂
Hi. As I’ve mentioned before we have an ex dhl sprinter too. I’ve removed all the racking and some a fair amount of cutting of the old welded on brackets that held the secure bulkhead. We are going for a layout similar to yours. I’m planning the bulkhead and was wondering what thickness of ply you used which is covered in the grey carpet stuff behind the little brackets that are left (can side) and how you secured them? Also what size are the batons you used for the bulkhead please and how did you secure them too? Thank you. Much appreciated.
Gregg and Sarah.
Hi Gregg, we actually used some of the old grey plastic material that lined the walls to clad the bulkhead rather than ply to cut down on weight and recycle some material! Apologies, I don’t remember the exact size of battens we used on the bulkhead, but there’s some photos on our Instagram where you might be able to get a rough idea of the size and how they’re attached. Thanks!
Hi, about to start with my conversion, i already have your book which I am reading and finding very useful and an interesting read.
With regards to insulating; what goes first? Insulation then vapour barrier? Do I leave a gap between the van wall and insulation as a cavity? I read somewhere that I should do this but your website and book don’t mention that.
Many thanks
Hi Paul, thanks for your message. The insulation stack should be like this: van wall > insulation > vapour barrier. Leaving a pocket of air in theory makes sense providing the cavity is well sealed as air does have good thermal properties in this scenario. However, in practice maintaining an air gap between the insulation is extremely difficult in a van so your best just to use insulation and the vapour barrier. Hope this helps!
Excellent!
Thank you so much
Can’t wait to make progress.
Hi Charlie, Dale,
My girlfriend and I are really finding your book helpful in converting our crafter!
I was wondering how much wool you got through whilst filling in the gaps?
Cheers,
Harry and Anna.
Hi Harry, hi Anna,
Unfortunately, I’m afraid we can’t remember exactly how much we got through. If you use the recycled bottle wool in your conversion, we would love to know how much you used as we get asked this a lot! best of luck guys!
Hi Charlie and Dale,
Thank you both so much for writing your book and creating this website. It’s taken away nearly all of the overwhelm of my first conversion. I’ve started on my Citroen relay L2H2, and have stripped and cleaned, rust treated and sealed. I’m now at building my bulkhead, and am unsure how to insulate the roof above the cab. There is already storage space above the headliner. But I’ve taken the headliner out to give it all a good clean (it used to be a gardening van and the dirt is real). It looks from pictures like you’ve insulated the roof here with aluminium bubble wrap, but is there anything behind it? It’s obviously not a huge space, but if it’s direct on the van metal I know it would condensate. Maybe bottle wool and adhesive spray? Thanks in advance for any guidance!
Amy
Hi Amy, we created a bit of an insulation sandwich, so we applied a vapour barrier to the roof of the van and the back of the headliner, tried to seal this as best we could with foil tape and then stuffed it with bottle wool. It’s a bit fiddly but good to try and get some insulation in there if you can! Hope that helps 🙂
It does! Thanks very much! 🙂
Is it best to put wooden wall battens for fixing on top of the vapor barrier or behind (between the van metal and barrier)?
Hi Ryan, we’d recommend fixing these on top of the vapour barrier. Thanks!
Hi guys,
im a complete novice here, i dont even own a van yet….but im soaking up as much info as possible before i get one. i dont have alot of money but i want to get things right 1st time around….Theres SO much conflicting advice about the first and in my view most important job of insulation. If im remembering correctly you advise to put, say celetex directly on the floor after cleaning and rust treating as necessary and then put vapour barrier down and then loose plywood floor. But i thought that would squash the vapour barrier when it needs to have a gap to be effective. I also wonder with insulating the walls, im thinking that firstly one would apply sound proofing, then a soft movable insulation, being maybe rockwool, bottle fabric or sheep wool fitted into the open areas of the metal pocketing….but this means there is nothing insulating the the frame work around those panels, Surely that can cause considerable heat loss. should there be an xtra layer of insulation that covers the rest of the internal walls so the panels are completely insulated. But then if thats the case how do we then put battens onto the walls because we cant see the panel work through the insulation. Then how do i make an air gap to put vapour barrier up and Then how to make sink/hob units and bed , cupboards, storage etc with nothing for them to be screwed to. It seems a total minefield . Or am i just over thinking it ?
Thankyou both for the insight !
Hi Rae, we recommend using insulation board such as Celotex for the large areas, and rockwool or recycled bottle wool for inside the pillars to ensure that everywhere is insulated. You should then apply your vapour barrier over the top of this, ensuring you mark where each pillar is so you know where to connect your battens to. For the flooring, you won’t end up having much of a gap between the insulation board, vapour barrier and the floor, but unfortunately this is pretty unavoidable. On the floors the shape of the wall will naturally create a bit of a gap. Hope that helps!
Dear Charlie and Dale, A big thank you for your step-by-step explanations. As a beginner, I have found them really useful. There is so much information on the net, and it is quite often misleading. Best wishes, T
Hi Theo, thanks for your message! We’re really glad to hear that you’ve been finding our articles useful 🙂 thanks!
Hey guys, thanks for all your help, we have been using your site, book and nomadic energy.
BUT please can you be clear about the gap we must leave between insulation boards and van metal because I have seen the exact opposite advice and it is stopping me from getting this insulation done! I was going to use slithers of packaging foam around the edges of the boards to create a gap. HELP! 😁
Hi Genevieve, you need to maintain a gap, as this ensures the reflective radiant barrier can be effective. Without the gap, the radiant barrier will not perform as well. Hope that helps!
Hey Guys. This article has been so useful for me! One question I have is how you went about insulating behind the over cab storage (if at all)? There’s lots of space down the sides of it but not much room across the top, so curious how you insulated here. Any tips would be massively appreciated! Also, love the book guys!
Hi Steven, glad you’ve found it useful! If you check the header image for this article, it shows the approach we took – we used lots of loose fill bottle wool and filled the space as much as possible before putting the headliner back in place. We found this worked really well as it can compact. Hope that helps!
Thanks so much! After you stuff with the loose wool did you line with a vapour barrier? Or does the over cab storage sort of work as a vapour barrier if you seal the gaps at the front? Sorry for the super specific questions, just trying to avoid any early mistakes haha.
Yep we added a vapour barrier before putting the cab lining back in place. Good luck!
Hello! Bought your book and finding it very helpful! Just bought a VW Crafter MWB and started with the rust treatment. I am about to order insulation as well and was wondering about insulation doors. Usually doors have little waterholes in them, so that water from door handles etc can get out again. So if insulation the back doors or sliding door, water would stay inside the door when bloscking of the holes with insulation. How did you do this? I was thinking just adding a sheet of insulation over the doors and leaving the gaps without insulation? Thanks, Stef
Hi Stef, it’s important you fully insulate the van without leaving gaps, otherwise this is an opportunity for heat to escape. You should ensure you use an insulation material that isn’t absorbent such as polyurethane board or bottle wool. If you use an absorbent material such as sheeps wool, it will hold the moisture, which will create a problem. If you make sure you don’t block the holes up, then the water will just pass through the insulation material. Hope that helps!
Hi there, first of wanted to say your book has been super useful so far in planning and starting my van conversion! I bought some soft insulation from your site which is very reasonable, however, for the PIR board insulation I was wondering if you still remember where you got yours from? There are big online stores which specialise in insulation but they charge £70-100+ for delivery, even just for about 10 boards! I would love to just pick some up locally in the van however local stores such as Jewsons are selling it for around £60 for a single board which is crazy. I can’t understand why there is so much difference in price and I just wanted to ask for any advice before I bite the bullet on delivery. Many thanks, Matt
Hi Matt, it was something like InsulationSuperstore, but it was several years ago now so costs etc may have changed. Hope you can find something suitable!
Hey guys, i just had a quick question, i wanted to do this exact method of insulation and put the wires along the battens, but how do i ground to the metal of the chassis if everything is covered? I have the same van as you. Should I maybe leave the metal at the back on the sides exposed until i finish the electric and then cover it? would that be an ok place to ground everything? or how have you done it
Hi Ana, you could connect a cable to the chassis now and run this to where your system will be, so that you can make the ground connection once the electrical system is installed. Hope that helps!
Hi Charlie and Dale,
Love the site and book, thanks for both.
We’re just planning a conversion of a Relay and won’t have a bulkhead (we have two young kids so need to use the cab space as a living space also).
Given this, how would you insulate the cab? I realise it won’t be great whatever we do! I’m also intrigued about the vapour barrier – would you try to use one at all in the cab? There will obviously still be exposed metal and so condensation whatever we do!
Thanks,
Max
Hi Max, Its great to hear you’ve found our site and book helpful! Thermal blinds with a reflective side are well worth investing in. They will be useful both in summer and winter to reflect heat away from the van and to keep heat in the van during winter. Because the glass is exposed to two different temperature zones (inside and outside) any moisture in the air will condensate on the cold surface, which is very hard to avoid with glass without double glazing. However dealing with moisture and ventilation in a van is always a challenge and using a vapour barrier on the rest of the body work will still be beneficial. Hope this helps!
That’s really helpful – thank you!
Hi, great advice in the book and online, thanks.
I have an ex-Virgin Media Transit Custom with a 12mm removable ply floor, secured to the sides of the van at floor level. The ply floor is not a ‘looker’ but it’s solid and bespoke to the vans footprint. I intend to keep the floor and cover it at a later date. What would you advise re insulating under the floor? If I keep the wooden floor do I need battens under it? The wooden floor is in good nick and robust, but not sure if it is robust enough to secure units etc. to? If it don’t need battens could I just use large pieces of 50mm board underneath?
The floor is ribbed, again any advice on insulating a ribbed floor?
Thanks and BW, John
Thanks John!
It is worth putting battens down, whilst the insulation board is strong and will take weight easily, it is best to have some solid structure beneath. This also gives you something to fix the flooring to!
Hi Charlie and Dale,
I’m also finding your book and website SUPER helpful in planning my conversion in the midst of all the confusing and contradicting information out there. Thanks for explaining everything so clearly and logically.
One thing I’m a bit confused by though is how you then attach the cladding battens through the vapour barrier. I understand you need to drill through the foil, but does that mean you drilled new holes in the metal ribs? I’d like to use pre-drilled holes as much as I can (with riv nuts), but don’t see how I would find them again once the vapour barrier is up – any advice?
Many thanks and all the best,
Christine
Hi Christine,
Thanks for your comment! Yes that’s correct the cladding battens were screwed into the metal pillars of the van (so it’s important to note where these are before insulating) using self driving screws that were roughly 20x45mm.
We hope that helps, best of luck with the build!
How did you insulate the wheel arches, please? In the photos it looks like there’s just vapour barrier stuck on them. Is that right? Thanks!
Hi Sarah,
Yes that’s correct we just used vapour barrier on our wheel arches, the awkward shape of them limits you from from doing much more than that. There are other products on the market such as Dodo Mat super liner that can be also used for the wheel arches, I hope that helps!